
How to Deep Clean a Vacuum Cleaner: A Complete Home Guide

Quick Answer
To deep clean a vacuum cleaner, disconnect the power, empty the dirt container, remove tangled hair, clear the air path, clean approved filters, wipe washable parts, and let everything dry fully before reassembly. Regular vacuum maintenance also helps control the household dust and allergens discussed by the U.S. Environmental Protection Agency.
Deep-clean your vacuum in this order
- Disconnect power: Unplug a corded vacuum or remove the battery when your model allows it.
- Empty the dirt: Remove the bag or empty the dust bin before opening other parts.
- Untangle the brush: Cut away hair, thread, and fibers without damaging bristles or wiring.
- Clear the airflow: Check the floorhead, wand, hose, and intake openings for blockages.
- Check the filters: Wash only filters that the manufacturer specifically labels as washable.
- Dry completely: Never reinstall a damp filter or wet component inside the powered machine.
I treat deep cleaning a vacuum as part of basic home hygiene, not just appliance care. A vacuum cleaning appliance collects hair, crumbs, fine dust, pet debris, and other material every time it runs.
The trouble is that some of that debris stays inside the machine. I find the worst buildup around brush rolls, filter edges, hose bends, seals, and the dirt-bin inlet.
- A vacuum that smells dusty may have trapped debris.
- A machine with weak pickup may have a blockage.
- A noisy brush roll may be wrapped with hair.
- A dirty filter may restrict airflow.
This guide shows how I approach the whole job without assuming every vacuum can be washed the same way. That distinction matters because upright, canister, stick, robot, and wet-dry vacuums use different parts.
In This Guide
- What does deep cleaning a vacuum cleaner mean?
- What should you do before cleaning a vacuum?
- How do you deep clean a vacuum cleaner step by step?
- Does the cleaning method change by vacuum type?
- How do you clean vacuum filters safely?
- How often should you deep clean a vacuum cleaner?
- Frequently asked questions
What Does Deep Cleaning a Vacuum Cleaner Mean?
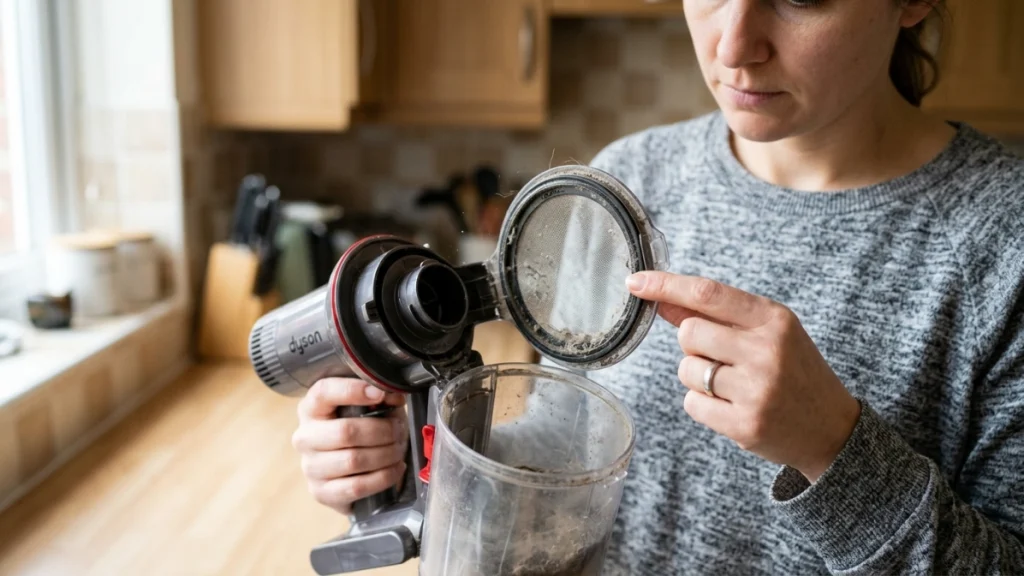
Deep cleaning a vacuum cleaner means cleaning the removable debris-contact parts and inspecting the full airflow path. It goes beyond emptying the dust bin or changing a bag.
A proper deep clean usually reaches the places you don’t inspect during normal use.
- Dust bin or bag chamber: Where collected debris sits.
- Brush roll: Where hair, thread, and fibers become wrapped.
- Floorhead: Where larger debris can lodge around openings.
- Wand and hose: Common locations for hidden blockages.
- Filters: Parts that trap smaller particles before air exits or reaches the motor.
- Attachments: Crevice tools and brushes that collect grime.
- Seals and vents: Areas where fine dust often settles.
The goal isn’t to make every internal surface wet. In fact, water is one of the things I use most cautiously around a vacuum.
Electrical contacts, batteries, motors, wiring, bearings, sensors, and non-washable filters should stay dry unless the manual gives different instructions.
As of 2026, there still isn’t one universal filter-cleaning method for every vacuum. The manufacturer’s instructions for your exact model should always override a generic cleaning routine.
Why deep cleaning can improve vacuum performance
A vacuum depends on free airflow. Hair around the brush roll, packed dirt in a bend, or a loaded filter can interfere with that path.
I usually check for a blockage before assuming weak suction means the motor has failed. A small wad of hair in the hose can cause a surprisingly noticeable change.
Regular cleaning also matters for household dust control. EPA guidance recommends frequent cleaning to reduce the buildup of indoor dust and allergens.
The Asthma and Allergy Foundation of America also recommends HEPA-filter vacuuming as one part of dust-mite allergen control.
Section Takeaway: A deep clean follows the entire path that dirt and air take through your vacuum. Cleaning only the visible bin leaves several common trouble spots untouched.
What Should You Do Before Cleaning a Vacuum?
Start by removing power from the machine. This is the most important safety step.
Unplug a corded model. For cordless models, remove the battery if the manufacturer designed it to be removable.
Gather simple cleaning supplies
I prefer basic tools because aggressive chemicals aren’t necessary for most vacuum maintenance.
- Microfiber cloths
- A small soft cleaning brush
- Scissors or a seam ripper for hair
- A trash bag or lined bin
- A blunt flexible cleaning brush for accessible tubes
- Warm water for manufacturer-approved washable parts
- Mild dish soap for plastic parts only when their instructions permit it
- Disposable gloves if the vacuum is especially dirty
Keep screwdrivers nearby only if your manual shows that a user-serviceable cover should be removed. I don’t open motor housings during routine cleaning.
Check the manual before anything gets wet
Look for the words washable, rinseable, or water only in the care instructions. Never assume a filter can be washed because another model uses a similar-looking filter.
HEPA describes a filtration standard, not whether a filter can safely get wet. The EPA’s explanation of HEPA filtration describes how these filters capture particles, but washability still depends on the product design.
If you’re sensitive to dust, emptying a dirty bin outside can reduce the cloud of debris released into your living area.
How Do You Deep Clean a Vacuum Cleaner Step by Step?
The safest method is to work from the dirt container toward the floorhead and attachments. I keep washable pieces separate from anything containing electrical parts.
1. Empty the bin or remove the bag
For a bagless vacuum, empty the dust cup before taking other components apart. This prevents loose debris from spilling while you work.
With a bagged model, remove a full bag according to the manufacturer instructions. Don’t shake a disposable bag to reuse it.
2. Clean the dust container
First wipe loose dust from the container with a dry microfiber cloth. Pay attention to corners and the inlet where packed debris often collects.
If the manufacturer says the bin is washable, remove it completely before rinsing. Never rinse a bin while it’s attached to the vacuum body.
3. Remove hair from the brush roll
The brush roll is one of the first places I inspect. Long hair, pet hair, thread, and carpet fibers can wind tightly around it.
- Turn the floorhead over.
- Remove the roller if your model provides a user-release mechanism.
- Find the groove intended for cutting hair, if present.
- Snip wrapped fibers in several places.
- Pull the loosened material away gently.
- Check both ends of the roller for trapped strands.
Avoid pushing scissors against bristles, belts, wires, or soft roller material. Never run a powered brush while trying to remove a tangle.
4. Inspect the floorhead and intake
Look directly into the opening behind the brush roll. Coins, paper, hair clumps, small toys, and other debris can lodge there.
Remove only objects you can reach safely. Don’t push a sharp metal tool into a hidden passage.
5. Clear the wand and hose
Detach the wand and hose if your model allows it. Look through each section toward a light source.
If you see a clog, work it out gently with your fingers or a long, blunt cleaning brush. Avoid rigid objects that could puncture or split a flexible hose.
I don’t pour water through a generic vacuum hose unless its manufacturer specifically says that part can be washed. Some hoses contain wiring or electrical connections.
6. Clean the attachments
Hair tends to collect in upholstery tools and mini motorized heads. Crevice tools also hold compacted dust along their narrow edges.
- Brush loose debris from dry attachments.
- Remove hair from bristled tools.
- Wipe non-washable tools with a slightly damp cloth.
- Wash only plain removable parts approved for water.
- Dry every washed piece fully.
7. Clean the filters correctly
Remove filters according to your manual. Tap loose dust into a trash bin only if that cleaning method is approved for your model.
Wash a filter only when the manufacturer labels it washable. Skip detergent unless the instructions specifically permit it.
8. Wipe seals, vents, and the exterior
A dry or slightly damp microfiber cloth works well for most exterior surfaces. I also wipe dust from the edges where the bin meets the vacuum body.
Don’t spray cleaner directly into switches, charging ports, vents, sensors, or electrical joints. Apply moisture to the cloth instead.
9. Let washed parts dry completely
This step can’t be rushed. Moisture trapped in a filter or enclosed air path can create problems once the vacuum starts moving air again.
Dry components in a ventilated place and follow the model’s specified drying period. Don’t use a filter that still feels damp.
10. Reassemble and test
Check that filters, covers, brush rolls, bins, and hoses are seated correctly. A poorly fitted seal can affect airflow.
Run the vacuum briefly on a clean surface. Listen for abnormal rattling and check that airflow feels normal.
Section Takeaway: Disconnect the vacuum, clean the debris path one component at a time, and keep water away from anything not explicitly washable. Full drying is part of the cleaning process, not an optional final step.
Does the Cleaning Method Change by Vacuum Type?
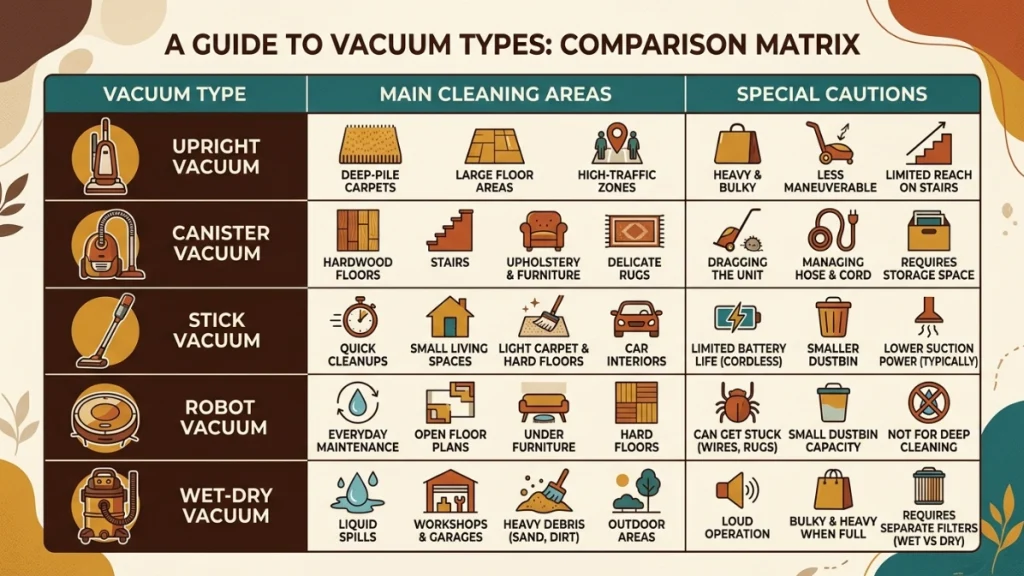
Yes. The basic dirt-removal process stays similar, but access points and water-safe parts differ.
| Vacuum Type | Main Areas to Deep Clean | Special Caution |
|---|---|---|
| Bagless upright | Dust cup, brush roll, hose, floorhead, pre-motor and exhaust filters | Check the long hose and brush chamber for hidden clogs. |
| Bagged canister | Bag chamber, hose, wand, floor tool, filters | Don’t wash disposable bags or electrical powerheads. |
| Cordless stick | Small bin, cyclone inlet, filter, wand, roller, floorhead | Keep battery contacts and powered joints dry. |
| Robot vacuum | Dust bin, main brush, side brushes, wheels, filter, sensors | Don’t wet sensors, charging contacts, cameras, or drive components. |
| Wet-dry vacuum | Tank, hose, accessories, float assembly, model-specific filter | Dry and wet pickup modes may require different filters or setup. |
Robot vacuums deserve extra care because they pack motors, sensors, charging contacts, and moving parts into a small housing.
Wet-dry vacuums are the opposite problem. Their tanks handle moisture, but that doesn’t mean every filter or motor component should be rinsed.
The rule I follow is simple: wash based on the part, not the appliance name.
How Do You Clean Vacuum Filters Safely?
Start by identifying the filter type and reading its care instructions. A filter that looks dirty isn’t automatically washable.
Washable filter
If the manufacturer specifically approves washing, remove loose surface dust first. Then follow its instructions for water temperature, rinsing, and drying.
Some manufacturers instruct owners to use water only and allow at least 24 hours of drying. Your exact model may require a different procedure or a longer drying period.
- Remove the filter from the machine.
- Follow the approved rinsing direction.
- Don’t add soap unless permitted.
- Shake off excess water if instructed.
- Air-dry completely.
- Reinstall only when fully dry.
Non-washable filter
Don’t rinse a filter labeled non-washable. Moisture can damage its filter media and structure.
Follow the manual’s dry-cleaning or replacement directions instead. Some filters should simply be replaced when loaded.
What about HEPA vacuum filters?
HEPA stands for high-efficiency particulate air. EPA explains that HEPA is a pleated mechanical filtration standard designed for very small airborne particles.
However, the HEPA label alone doesn’t tell you whether that vacuum filter is washable. Always check the manufacturer’s instructions.
Never reinstall a damp filter
This is one mistake I avoid even when I’m in a hurry. The vacuum moves a large amount of air directly through or past its filters.
A damp component should stay outside the machine until it has completely air-dried. Don’t try to speed the process with a hot oven or other high-heat method unless explicitly approved.
Section Takeaway: Filter type and model instructions determine the cleaning method. “HEPA” does not mean “washable,” and a washed filter must be completely dry before it goes back into the vacuum.
How Often Should You Deep Clean a Vacuum Cleaner?
There isn’t one schedule that fits every home. Usage, pets, flooring, hair, dust levels, and vacuum design all change how quickly debris builds up.
For my household cleaning routine, I prefer condition-based maintenance instead of waiting for a fixed calendar date.
| Maintenance Task | Practical Check Point |
|---|---|
| Empty bag or bin | Before it becomes overfilled, following the fill line or manual |
| Inspect brush roll | Whenever visible hair or fibers begin wrapping around it |
| Check airflow path | When pickup drops, airflow changes, or unusual noise starts |
| Clean or replace filters | At the interval stated by the manufacturer |
| Full deep clean | When multiple components show buildup, or roughly every one to three months in frequently used household machines |
Homes with shedding pets or long-haired occupants may need brush-roll care much more often. Fine debris can also load filters faster.
EPA recommends regular vacuuming as part of reducing indoor dust and allergen buildup. That maintenance works best when the vacuum itself is kept in usable condition.
Signs your vacuum needs cleaning now
- Suction or pickup has dropped.
- The vacuum smells stale or dusty.
- Hair is wrapped around the brush roll.
- The hose makes an unusual whistling sound.
- Debris falls back onto the floor.
- The bin inlet has visible buildup.
- The vacuum runs differently than usual.
What if deep cleaning doesn’t fix the problem?
Stop and inspect for a damaged belt, cracked hose, poorly seated filter, worn seal, blocked internal passage, or defective part.
If you notice burning smells, melted plastic, sparking, exposed wiring, battery swelling, or repeated overheating, stop using the appliance.
Expert Alert: Electrical repairs, motor disassembly, damaged lithium-ion batteries, and internal wiring repairs should be handled by a qualified service professional rather than treated as routine DIY cleaning.
Visible mold also deserves caution. The CDC’s mold guidance explains that mold exposure can affect sensitive people.
If a vacuum has extensive mold contamination, water inside the motor housing, or contamination you cannot safely reach, professional service or replacement may be safer than deeper disassembly.
Section Takeaway: Let the condition of your vacuum guide maintenance, while following the manufacturer’s filter and service schedule. Stop cleaning and seek professional help when the problem involves electrical damage, batteries, or inaccessible contamination.
Frequently Asked Questions About Deep Cleaning a Vacuum Cleaner
Can I wash the inside of my vacuum cleaner?
Only wash removable parts that the manufacturer specifically identifies as washable. Never rinse the motor housing, electrical connections, battery, charging contacts, powered floorhead, or other electronic components unless your model’s instructions explicitly permit it.
Can I wash a vacuum hose with water?
Not automatically. Some plain hoses may be washable, while others contain electrical wiring or connections. Check the manual first. For a generic vacuum, clearing the hose with a soft, blunt cleaning tool is the safer default.
Can I wash a HEPA vacuum filter?
Only if the filter manufacturer says it is washable. HEPA describes filtration performance, not water resistance. Some HEPA filters can be rinsed, while others must remain dry and be replaced when dirty.
How long should a vacuum filter dry?
Follow the manufacturer’s drying time. Some major vacuum manufacturers specify at least 24 hours for certain washable filters, but your model may differ. Reinstall the filter only when every part of it is fully dry.
Why does my vacuum smell after I clean it?
Check for hidden debris in the brush roll, hose, bin inlet, attachments, and filters. A damp filter can also create an unpleasant smell. If you notice a burning or electrical odor, turn the machine off instead of continuing to use it.
Should I disinfect my vacuum cleaner?
Routine deep cleaning usually focuses on removing debris from manufacturer-approved parts. Don’t spray disinfectant into the motor, filters, vents, or electrical areas. If disinfection is needed, follow both the appliance instructions and the product label.
Can I put baking soda or fragrance inside my vacuum?
I don’t recommend adding powders, essential oils, or fragrance directly to a vacuum unless its manufacturer approves them. Fine powders can load filters, while liquids and oils may damage materials or leave residue in the airflow path.
Deep cleaning a vacuum isn’t complicated once you separate dry maintenance from parts the manufacturer says you can wash. Empty the dirt, untangle the brush roll, clear the airflow path, care for the filters correctly, and give washed components enough time to dry.
Most of all, don’t force a generic cleaning trick onto a machine that was designed differently. Check your model’s manual whenever you’re unsure, and your next deep clean will be both safer and easier.
