Brush for Dryer Vent Cleaning: Proven, Essential Tool
A brush for dryer vent cleaning is a crucial tool for preventing fires, improving dryer efficiency, and extending the life of your appliance. It helps remove lint buildup that restricts airflow and poses a safety hazard.
A clogged dryer vent is a hidden danger in many homes. Lint, a highly flammable material, builds up over time. This buildup can cause your dryer to overheat and potentially start a fire. It also makes your dryer work harder, using more energy and taking longer to dry clothes. Fortunately, a simple tool can solve this problem: a brush for dryer vent cleaning. This guide will show you why it’s essential and how to use it effectively.
Why a Brush for Dryer Vent Cleaning is a Must-Have Tool
A brush for dryer vent cleaning is more than just a cleaning tool. It’s a vital part of home safety and appliance maintenance. Its primary function is to dislodge and remove accumulated lint from the dryer vent system. This simple act prevents dangerous heat buildup and improves your dryer’s performance.
Understanding Dryer Vent Lint Buildup
Lint is a byproduct of drying clothes. As clothes tumble, fibers shed and are typically captured by the dryer’s lint filter. However, some fine lint particles bypass the filter and travel into the dryer vent hose. Over months and years, this lint accumulates, creating blockages.
The Dangers of Clogged Dryer Vents
Clogged dryer vents are a significant fire hazard. The U.S. Fire Administration reports that clothes dryers are a leading cause of home fires. These fires are often caused by lint igniting from the dryer’s heat. Beyond fire risk, clogs reduce airflow, making your dryer less efficient. This leads to longer drying times and increased energy consumption.
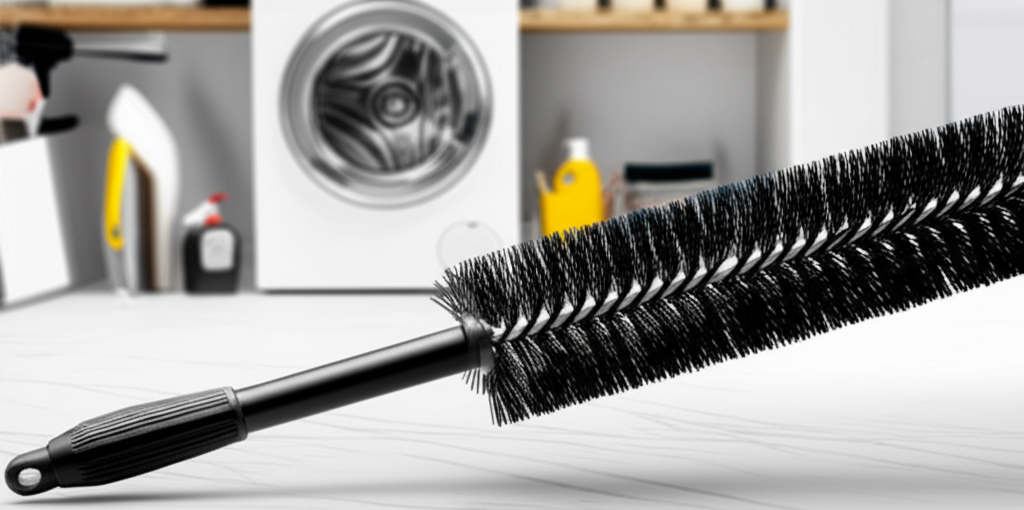
Types of Dryer Vent Brushes and Their Features
When looking for a brush for dryer vent cleaning, you’ll find several types. Each is designed to tackle the specific challenges of dryer vents. Understanding these differences helps you choose the best tool for your needs.
Flexible Rod Dryer Vent Brushes
These brushes typically consist of flexible rods that screw together. You can add more rods to reach longer vents. The brush head attaches to the end.
Pros: Excellent for reaching deep into long or complex vent systems.
Cons: Can be tricky to maneuver in very tight turns.
Best Use: Long straight vents or vents with gentle curves.
Chimney Brushes (Modified for Dryer Vents)
Some homeowners adapt chimney brushes. These are usually sturdier and have stiffer bristles. They are often used with a power drill for more aggressive cleaning.
Pros: Can remove stubborn lint buildup effectively.
Cons: May be too stiff for flexible dryer vent hoses and could damage them.
Best Use: Rigid metal vents, but use with caution on flexible hoses.
Specialized Dryer Vent Cleaning Kits
Many kits combine flexible rods with various brush heads. Some even include a hook to pull out large lint clumps. They are designed specifically for dryer vents.
Pros: All-in-one solution for comprehensive cleaning.
Cons: Can be more expensive than a simple brush and rod.
Best Use: Comprehensive cleaning of various vent types.
How to Choose the Right Brush for Your Dryer Vent
Selecting the right brush for dryer vent cleaning depends on your vent’s length, material, and layout. Consider the flexibility and stiffness of the bristles. Also, think about the brush head size and how it will connect to your vent.
Measuring Your Vent Length and Diameter
Most dryer vents are 4 inches in diameter. However, it’s always best to measure. Knowing the length helps you determine how many flexible rods you’ll need.
Bristle Type and Stiffness
Softer bristles are safer for flexible plastic or foil vents. Stiffer bristles are better for rigid metal vents but can damage softer materials. Many brushes offer a good balance for general use.
Rod Flexibility and Connection
Ensure the rods are flexible enough to navigate bends. The connection mechanism between rods should be secure to prevent them from separating inside the vent. A secure connection is vital for effective cleaning.
The Essential Process: Using Your Brush for Dryer Vent Cleaning
Cleaning your dryer vent with a brush is a straightforward process. It requires a few simple steps to ensure safety and effectiveness. Always unplug your dryer before starting.
Step 1: Disconnect the Dryer from the Vent
Gently pull the dryer away from the wall. Disconnect the vent hose from the back of the dryer and the wall outlet. This gives you full access to the vent system.
Step 2: Clean the Lint Filter and Dryer Opening
Thoroughly clean the dryer’s lint filter. Use a brush or vacuum to remove any lint from the filter compartment. Also, clean the area where the vent hose connects to the dryer.
Step 3: Insert the Brush into the Vent
Assemble your flexible rod brush to the desired length. Insert the brush head into the vent opening. Slowly push the brush into the vent, adding rod sections as needed.
Step 4: Rotate and Scrub
Gently rotate the brush as you move it in and out of the vent. This action dislodges lint from the vent walls. Do this for the entire length of the vent.
Step 5: Remove Loose Lint
After brushing, use a vacuum cleaner with a hose attachment to suck out the loosened lint. You can also use a leaf blower (from the outside vent opening) to blow out residual lint. Always wear a mask to avoid inhaling dust.
Step 6: Reconnect and Test
Reattach the vent hose securely to the dryer and the wall. Push the dryer back into place. Plug it in and run the dryer on an air-only setting for a few minutes to ensure proper airflow.
Benefits of Regular Dryer Vent Cleaning
Regularly cleaning your dryer vent with a brush offers significant advantages. These benefits extend beyond just safety and include cost savings and better appliance performance. Making this a routine task pays off.
Enhanced Safety and Fire Prevention
The most critical benefit is reducing the risk of a dryer fire. Removing flammable lint buildup is key to preventing house fires. This simple maintenance task protects your home and family.
Improved Dryer Efficiency and Faster Drying Times
A clean vent allows for better airflow. This means your dryer doesn’t have to work as hard. Clothes will dry faster, saving you time and reducing energy consumption.
Extended Dryer Lifespan and Reduced Repair Costs
When a dryer runs efficiently without being clogged, its components experience less strain. This can lead to fewer breakdowns and a longer operational life for your appliance. It also prevents costly repairs related to overheating.
Lower Energy Bills
An efficient dryer uses less energy. By keeping the vent clean, you’ll notice a difference in your electricity or gas bills. This makes it an economically smart practice.
When and How Often to Clean Your Dryer Vent
The frequency of dryer vent cleaning depends on usage and the type of clothes you dry. For most households, annual cleaning is recommended. However, some situations call for more frequent attention.
Typical Cleaning Schedule
Once a year: For average households that do laundry a few times a week.
Every six months: If you have a large family, do a lot of laundry, or dry heavy items like bedding frequently.
After every few months: If you notice longer drying times or the dryer feels excessively hot.
Signs Your Dryer Vent Needs Cleaning
Clothes take longer than usual to dry.
The dryer exterior feels unusually hot to the touch.
The lint filter is full after only one load.
A burning smell is present when the dryer is running.
* The vent hood flap outside doesn’t open much when the dryer is on.
Troubleshooting Common Dryer Vent Cleaning Issues
Even with the right tools, you might encounter challenges. Knowing how to troubleshoot common problems ensures you can still achieve a clean vent. Patience and the right approach are key.
Stubborn Lint Buildup
For very dense lint, you might need to make multiple passes with the brush. Sometimes, a shop vacuum can help pull out larger clumps before brushing. Consider a more robust brush if your current one isn’t effective.
Vent Hose Damage
If your vent hose is old, brittle, or damaged, be extra gentle. Use a brush with softer bristles and avoid excessive force. If the hose is significantly damaged, it’s time to replace it.
Difficult-to-Reach Areas
For vents with many sharp turns or very long runs, you might need extra rod sections. Some specialized kits offer angled brush heads for better maneuverability. Planning your approach can help.
Maintaining Your Dryer Vent Brush
Proper care of your brush for dryer vent cleaning ensures its longevity and effectiveness. A well-maintained tool performs better and lasts longer. This saves you money and hassle in the long run.
Cleaning the Brush Head
After each use, remove as much lint as possible from the brush head. You can use your fingers, a comb, or even a vacuum cleaner. Rinse the brush head with water if it’s washable and let it air dry completely.
Storing the Brush
Store the brush and rods in a dry place. Ensure all parts are clean and dry before storing to prevent mold or rust. A dedicated storage bag or container is ideal.
Safety Precautions for Dryer Vent Cleaning
Safety should always be your top priority when cleaning your dryer vent. These precautions protect you and your home from potential hazards. Always follow these guidelines.
Unplug the Dryer
Always disconnect the power supply to your dryer before starting. This prevents accidental startups and electrical shock. For gas dryers, also turn off the gas supply valve.
Wear Protective Gear
Wear a dust mask to avoid inhaling lint particles. Gloves can protect your hands from sharp edges or irritants. Safety glasses can prevent dust from getting into your eyes.
Check for Damage
Inspect the vent hose and connections for any tears, holes, or damage before cleaning. Damaged vents can be a fire hazard themselves and may need replacement. Do not use a damaged vent.
Ventilate the Area
Ensure the room is well-ventilated during cleaning. Open windows and doors if possible. This helps disperse any dust or debris stirred up during the process.
Comparison: Dryer Vent Brush vs. Other Cleaning Methods
While a brush is the most common tool, other methods exist. Understanding their pros and cons helps you appreciate why a brush is often the best choice.
| Method | Pros | Cons | Best For |
| :———————— | :—————————————– | :———————————————– | :——————————————— |
| Dryer Vent Brush | Effective, accessible, DIY-friendly | Requires manual effort, may miss some spots | Regular maintenance, most vent types |
| Vacuum Attachments | Good for surface lint, easy to use | Limited reach, cannot dislodge deep clogs | Initial lint removal, dryer interior |
| Leaf Blower (Exterior)| Forces out loose debris, quick | Can be messy, may not remove stuck-on lint | Blowing out loosened lint from outside |
| Professional Service | Thorough, uses specialized equipment | Costly, requires scheduling | Very long or complex vents, lack of time/skill |
A brush for dryer vent cleaning offers a balanced approach. It provides effective cleaning without the high cost or complexity of professional services. It’s the ideal tool for homeowners to maintain their appliances.
Frequently Asked Questions About Dryer Vent Brushes
Q1: How often should I use a brush for dryer vent cleaning?
You should clean your dryer vent at least once a year. If you have a large family or do heavy laundry, clean it every six months. Look for signs like longer drying times, which indicate a need for cleaning.
Q2: Can a brush for dryer vent cleaning damage my vent hose?
It’s possible if you use a brush that’s too stiff for your vent material. Always check your vent type. Flexible plastic or foil hoses are delicate. Opt for brushes with softer bristles for these.
Q3: What is the best type of brush for dryer vent cleaning?
Flexible rod brushes are generally the best for most homes. They can be extended to reach the full length of the vent. Kits with multiple rod sections offer the most versatility.
Q4: Can I use a power drill with my dryer vent brush?
Some people do, especially with stiffer brushes for rigid metal vents. However, using a drill can spin the brush too fast and damage flexible hoses. Always use a low setting and extreme caution if you choose this method.
Q5: How do I know if my dryer vent is completely clean?
After cleaning, run your dryer on an air-only cycle for about 15 minutes. The exhaust air coming from the outside vent should feel warm but not excessively hot. Clothes should also dry within a normal timeframe.
Q6: Where can I buy a good brush for dryer vent cleaning?
You can find these brushes at most hardware stores, home improvement centers, and online retailers like Amazon. Look for well-reviewed kits with flexible rods and appropriate brush heads for your vent type.
Conclusion: Invest in a Brush for Dryer Vent Cleaning for a Safer Home
A brush for dryer vent cleaning is an indispensable tool for every homeowner. It’s your first line of defense against dryer fires and a key to efficient laundry days. Investing a small amount in a quality brush and dedicating a little time each year can save you from potential disaster and improve your dryer’s performance significantly. Make dryer vent cleaning a regular part of your home maintenance routine. Your home and your wallet will thank you.


