
How Do I Fix Robot Vacuum Navigation Problems?

Quick Answer
To fix robot vacuum navigation problems, start by cleaning its navigation, wall, cliff, and obstacle sensors. Then clear the floor, check the charging dock position, restart the robot, update its app or firmware, and rebuild the map only if simpler fixes fail. Manufacturer guidance also shows that moving the robot or dock during mapping can cause positioning problems, so follow your model’s navigation instructions closely.
Try These Fixes in Order
- Clean the sensors: Dust, hair, and fingerprints can interfere with navigation readings.
- Clear the route: Remove cords, lightweight rugs, shoes, bags, and low obstacles that trap the robot.
- Check the dock: Keep it powered, stable, accessible, and in the same position used during mapping.
- Restart the robot: A normal reboot can clear temporary positioning or app communication problems.
- Restore the map: Use a saved map if your manufacturer’s app provides that option.
- Remap last: Delete and rebuild the map when the existing map stays distorted, incomplete, or inaccurate.
Robot vacuums can look surprisingly confused when navigation goes wrong. They may circle one chair, skip a bedroom, create a crooked map, or wander around without finding the dock.
I troubleshoot these problems from the simplest cause upward. That approach avoids deleting a good map when the real problem is only a dusty sensor or blocked docking route.
In This Guide
- What Causes Robot Vacuum Navigation Problems?
- How Do I Fix Robot Vacuum Navigation Problems Step by Step?
- Why Does My Robot Vacuum Get Lost or Miss Rooms?
- Why Can’t My Robot Vacuum Find Its Charging Dock?
- Should I Restore, Reset, or Remap My Robot Vacuum?
- When Should I Contact Robot Vacuum Support?
- Robot Vacuum Navigation FAQ
What Causes Robot Vacuum Navigation Problems?
A robot vacuum navigation problem happens when the machine cannot accurately detect its position, obstacles, cleaning route, map, or charging station. The exact cause depends partly on the navigation technology inside your model.
As of 2026, robot vacuums commonly combine sensors, cameras, LiDAR, gyroscopes, wall detection, or software-based mapping. A problem with any part of that system can change how the robot moves.
Common causes of poor robot vacuum navigation
- Dirty sensors: Dust can cover cliff, wall, optical, LiDAR, or obstacle-detection sensors.
- Blocked pathways: Cables, clothing, toys, chair legs, and clutter can interrupt planned routes.
- Moved charging dock: Some mapping systems use the dock as a fixed reference point.
- Robot moved manually: Picking it up during a cleaning or mapping cycle can confuse positioning.
- Map corruption: A stored map can become distorted, duplicated, rotated, or incomplete.
- Lighting conditions: Camera-based navigation may depend more on visible environmental landmarks.
- Reflective surfaces: Mirrors, glass, strong sunlight, or unusual reflections can affect some sensors.
- Wheel problems: Hair or debris around a wheel can change the robot’s movement unexpectedly.
- Software issues: An app, firmware, or temporary system fault can affect mapping behavior.
Not every unusual movement means something is broken. Older robots using responsive navigation may change direction frequently instead of following neat parallel lines.
iRobot, for example, explains that some older navigation systems use responsive algorithms, while newer mapping models can use visual localization and stored maps. That difference changes what “normal” movement looks like.
| Symptom | Likely Area to Check | Best First Fix |
|---|---|---|
| Spins or changes direction repeatedly | Sensors, wheels, obstacles | Clean sensors and inspect wheels |
| Skips a room | Doorway, map, no-go zones | Open the route and check map boundaries |
| Map appears crooked or duplicated | Saved map or localization | Restore a known-good map |
| Cannot return to dock | Dock position, route, dock sensor | Clear the docking area and clean sensors |
| Stops before mapping the whole home | Closed doors, obstacles, battery, thresholds | Prepare the floor and repeat mapping |
Section Takeaway: Start by identifying the exact symptom. Navigation problems are easier to solve when you separate sensor, mapping, docking, and physical movement issues.
How Do I Fix Robot Vacuum Navigation Problems Step by Step?
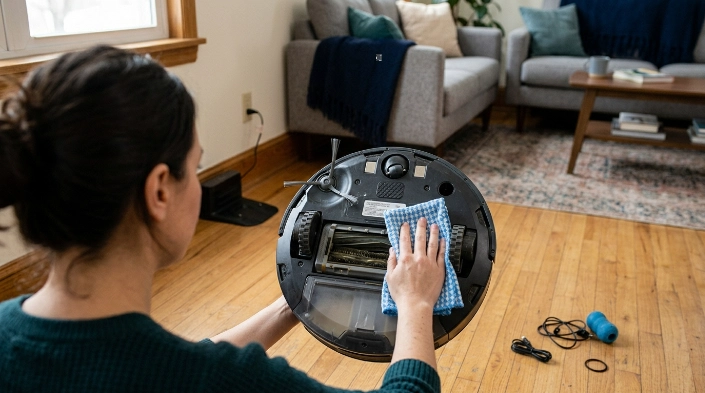
Fix navigation problems by working through physical causes before deleting maps or performing resets. Most of the early checks take only a few minutes.
1. Pause the robot and inspect the floor
Remove loose cables, socks, bags, lightweight mats, pet toys, and other objects from its route. Consumer Reports also recommends giving robot vacuums a clear path around rooms and their docking stations.
You can review their broader robot vacuum setup guidance when preparing a difficult room.
2. Clean every navigation sensor
Turn the robot off before cleaning it. Use a soft, dry microfiber cloth unless your owner’s manual specifies another method.
Check these areas where applicable:
- Cliff or drop sensors underneath the robot
- Wall-following sensors
- Front obstacle sensors
- Camera lens
- LiDAR turret or laser window
- Dock locator or infrared window
- Charging contacts
A thin dust film can be easy to miss. Avoid soaking sensor windows or spraying cleaner directly onto the robot.
3. Inspect wheels and brushes
Hair wrapped around a caster or drive wheel can make the robot pull toward one side. That physical problem may look like a software navigation fault.
Remove wrapped hair and trapped debris. Confirm that both drive wheels move normally and spring back when pressed, if your model uses spring-loaded wheels.
4. Restart the robot and app
Use the manufacturer’s normal restart procedure rather than immediately performing a factory reset. Also close and reopen the companion app.
Check for firmware and app updates afterward. Manufacturers sometimes change mapping or navigation behavior through software updates.
5. Run a simple test
Start the robot from its normal dock and let it clean an uncluttered area. Avoid carrying it to another room during the test.
Watch whether it moves systematically, recognizes doorways, and returns toward the dock. This helps separate a house-layout problem from a persistent robot fault.
Section Takeaway: Clean first, reset later. A physical obstruction, dirty sensor, or wheel problem should be ruled out before you sacrifice a working map.
Why Does My Robot Vacuum Get Lost or Miss Rooms?
A robot vacuum usually misses rooms because it cannot reach them, does not recognize them on its map, or incorrectly believes a boundary blocks the route. Closed doors and map settings are common places to start.
Check doorways and thresholds
Open every door you want included during a mapping run. Remove temporary objects from narrow entrances.
A tall threshold or thick rug can also create a physical barrier. Watch one cleaning cycle to see whether the robot attempts the transition and backs away.
Review no-go zones and room boundaries
Open the map editor and inspect virtual walls, keep-out zones, room dividers, and carpet restrictions. A misplaced digital boundary can block an entire room.
If you recently rearranged the map, compare the current version with an older saved version. Some apps provide map recovery without requiring a complete rebuild.
Keep the environment stable during mapping
Don’t move the robot from room to room while it is learning the floor. Also avoid relocating the charging station halfway through the process.
ECOVACS advises opening doors, removing floor obstacles, and allowing the robot to complete its mapping process without being moved. Its current mapping guidance also recommends leaving the dock in place after the map is created.
Consider lighting and reflective surfaces
Camera-based robots may work better when they can see consistent environmental features. Try mapping with normal room lighting if your model relies on a camera.
Strong sunlight, mirrors, glossy objects, and dark surfaces can also interfere with certain navigation systems. The effect varies by sensor design.
Section Takeaway: A missing room is often a route or map problem rather than a failed vacuum. Check the physical doorway and the digital map together.
Why Can’t My Robot Vacuum Find Its Charging Dock?
A robot may fail to dock when the route is blocked, the station has moved, its locator area is dirty, or the robot has lost its position. Start by checking the dock itself.
Give the dock enough open space
Put the station against a stable wall on a hard, level surface when the manufacturer recommends that arrangement. Keep the approach path clear.
Clearance requirements vary by model. For one common Roborock support configuration, the manufacturer specifies at least 0.5 meters on each side and 1.5 meters in front when troubleshooting docking.
Always use your own model’s manual when its dimensions differ. You can see the verified Roborock docking guidance for that example.
Don’t move the dock casually
If your vacuum already created a map, moving its base can create localization trouble on some models. Return it to its mapped position when possible.
Make sure the station has power. Also inspect the charging contacts and any infrared or locator windows for dust.
Start cleaning from the dock
For troubleshooting, let the robot leave its station normally instead of placing it manually in another room. This gives compatible mapping systems a consistent starting reference.
If it docks successfully after this test, the earlier failure may have resulted from manual relocation or a blocked return path.
Section Takeaway: Docking depends on both navigation and physical access. Keep the station powered, clean, stable, and easy to approach.
Should I Restore, Reset, or Remap My Robot Vacuum?
Restore an older map before creating a new one when your app supports map recovery. Remapping should usually come after sensor cleaning, route checks, restarts, and map restoration.
Restore the map when it suddenly looks wrong
A saved backup is useful when the current map becomes rotated, overlapping, duplicated, or distorted. Restoring can preserve room labels and boundaries depending on the brand.
ECOVACS, for example, recommends trying its Restore Map function before deleting a confused map. If restoration fails, its support guidance suggests creating a fresh map.
Remap when the layout stays inaccurate
Before starting a new mapping run:
- Charge the robot adequately.
- Put the charging dock in its permanent location.
- Open doors to all included rooms.
- Remove cables and temporary floor clutter.
- Check that sensors and wheels are clean.
- Start mapping from the dock when your model requires it.
- Do not pick up the robot during the run.
- Let it finish and return on its own when required.
iRobot’s Smart Map guide likewise recommends a dedicated mapping run for compatible models and warns against obstacles that can interrupt exploration.
Factory reset only when necessary
A factory reset is different from deleting one map. It may remove Wi-Fi settings, schedules, preferences, and stored data depending on the model.
Check your manufacturer’s reset instructions first. Don’t use a factory reset merely because one room was skipped once.
Section Takeaway: Use the least destructive fix first. Restore a known-good map before deleting it, and reserve a factory reset for persistent problems.
When Should I Contact Robot Vacuum Support?

Contact the manufacturer when navigation remains unreliable after cleaning, restarting, remapping, and checking the dock. Repeated sensor errors can point to hardware rather than housekeeping.
Support is especially worthwhile when you notice:
- A LiDAR turret that does not rotate normally
- A camera or sensor error that returns after cleaning
- One drive wheel that will not move correctly
- Repeated cliff-sensor errors on ordinary flooring
- A robot that cannot recognize its dock after a clean remap
- Physical damage to the sensor housing
- Navigation problems that began immediately after an impact or liquid exposure
Expert Alert: Don’t open sealed electronics, bypass safety sensors, or attempt electrical repairs unless the manufacturer specifically authorizes them. Use qualified service for internal electrical or battery-related faults.
Before contacting support, record the model number, firmware version, error code, and a screenshot of the map. A short video of the navigation failure can also make the problem easier to explain.
Robot Vacuum Navigation FAQ
Why is my robot vacuum suddenly going in circles?
Circling can result from dirty obstacle sensors, a jammed caster, hair around a drive wheel, or a wheel that is not moving correctly. Clean the sensors and wheels first, then restart the robot and test it on a clear floor.
Why has my robot vacuum map become distorted?
A distorted map can appear after the robot or dock is moved, localization fails, or mapping is interrupted. Try restoring a saved map first. If the problem returns, prepare the floor carefully and create a fresh map.
Should I move my robot vacuum to a room it keeps missing?
Not during a mapping or full cleaning run unless your manufacturer tells you to do so. Carrying the robot can confuse some positioning systems. Instead, check the doorway, map boundaries, virtual walls, thresholds, and floor obstacles.
Can darkness affect a robot vacuum?
It depends on the navigation system. Camera-based models may depend more on visible environmental features, while LiDAR-equipped robots use laser-based ranging. Check your model’s manual if navigation becomes noticeably worse in low light.
Why does my robot vacuum keep bumping into furniture?
Some contact with furniture can be normal because certain robots use bump sensors as part of navigation. Frequent or unusually hard collisions deserve attention. Clean the front sensors and bumper area, then check whether the bumper moves freely.
How often should I clean robot vacuum sensors?
Use the maintenance interval in your owner’s manual because designs vary. I also inspect sensors whenever navigation suddenly changes. A quick dry wipe is often easier than diagnosing a bad map after several failed cleaning runs.
Do I need to remap after moving furniture?
Not always. Many modern robot vacuums can adapt to ordinary furniture changes. Consider remapping when major layout changes create persistent room, boundary, or localization errors that normal cleaning runs do not correct.
The simplest troubleshooting order is sensor cleaning, floor preparation, dock inspection, restart, map restoration, and then remapping. That sequence solves the common causes without immediately erasing useful settings.
If your robot still gets lost after those checks, use the manufacturer’s model-specific support instructions. Navigation hardware and map behavior can differ substantially between robot vacuum generations.
“`
