
How Do I Fix a Noisy Vacuum Cleaner?

Quick Answer
To fix a noisy vacuum cleaner, unplug it first, then check the dust bin or bag, filters, hose, brush roll, belt, floor head, and attachments. A new rattling, squealing, grinding, or high-pitched sound can point to a blockage or worn moving part. Stop using the vacuum if the noise becomes extreme, you smell burning, or the machine overheats; the NIDCD hearing-safety guidance explains why unusually loud sound should not be ignored.
Quick troubleshooting steps
- Disconnect power: Unplug a corded vacuum or remove the battery if your model allows it.
- Empty the vacuum: Check an overfilled bag or dust bin before taking anything apart.
- Clear airflow: Inspect the hose, wand, intake, filters, and attachments for restrictions.
- Inspect the brush: Remove hair, thread, carpet fibers, and other debris wrapped around the roller.
- Check moving parts: Look for a damaged belt, loose wheel, rattling cover, or poorly seated attachment.
- Stop for serious sounds: Grinding, burning smells, smoke, or repeated overheating need professional attention.
A vacuum that suddenly sounds different deserves attention. I usually start with the easy airflow and brush-roll checks before assuming the motor has failed.
That approach solves many everyday vacuum noises without unnecessary disassembly. This 2026 guide covers rattling, squealing, grinding, whistling, pulsing, clicking, and unusually loud motor sounds.
In This Guide
Why Is My Vacuum Cleaner Suddenly So Loud?
A vacuum often becomes louder when airflow changes or a moving part encounters extra resistance. Clogs, dirty filters, tangled brush rolls, loose objects, worn belts, and damaged rotating parts are common places to investigate.
A noisy vacuum cleaner is a vacuum producing a new or abnormal sound compared with its usual operating noise. The change matters more than whether the machine seemed loud when new.
Every vacuum creates sound from its motor, moving air, floor head, and sometimes a powered brush. Different models naturally operate at different sound levels.
A sudden change is more useful diagnostically. Listen for both the sound and the moment it appears.
- Noise starts immediately: Check the motor area, filters, fan path, and loose body parts.
- Noise starts on carpet: Inspect the brush roll, belt, carpet-height setting, and floor head.
- Noise changes with an attachment: Look for a blockage or air leak in that tool.
- Noise appears with weak suction: Check the bin, bag, filters, hose, and intake path.
- Noise occurs during turns: Inspect wheels, casters, robot-vacuum side brushes, and the floor head.
Restricted airflow can change the pitch of a vacuum dramatically. A blocked hose may produce a sharper whistle while also reducing pickup performance.
Household dust can include pollen, pet material, mold spores, fibers, and other particles. The EPA recommends routine cleaning and notes that vacuuming itself can stir settled dust, making proper filtration and maintenance important.
You can read the EPA’s guidance on indoor particulate matter and household dust for broader dust-control information.
Section Takeaway: A vacuum’s new sound is a symptom, not a diagnosis. Note when the noise appears, then inspect the simplest airflow and moving-part causes first.
What Does Each Vacuum Noise Usually Mean?
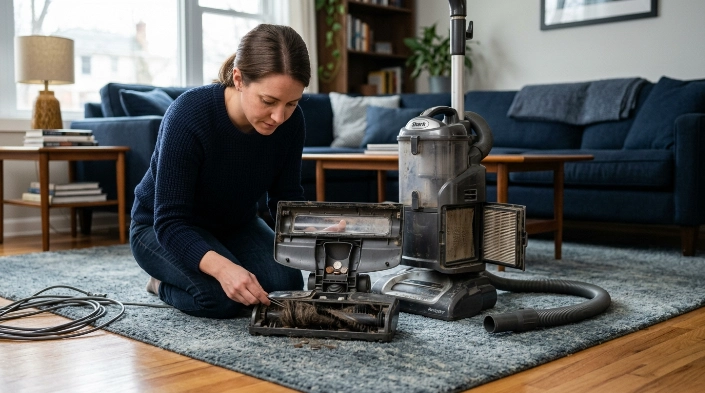
The type of noise can narrow your search quickly. Rattles usually suggest something loose, while squeals and grinding sounds deserve faster attention.
Use this table as a starting point rather than a guarantee. Vacuum designs vary between upright, canister, stick, cordless, robot, and handheld machines.
| Noise | Likely Area | Common Cause | First Check |
|---|---|---|---|
| Rattling | Hose, floor head, bin, body | Loose debris or loose component | Remove debris and reseat removable parts |
| High-pitched whistle | Airflow path | Partial clog or air leak | Check hose, seals, filters, and attachments |
| Squealing | Brush roll or belt system | Restricted roller or worn drive component | Inspect roller movement and belt condition |
| Grinding | Brush, bearings, fan, motor | Damaged or contacting moving part | Stop the vacuum and inspect accessible parts |
| Clicking or tapping | Floor head or brush roll | Hard object striking the roller | Check for coins, clips, stones, or toy pieces |
| Pulsing or surging | Airflow or electronic control | Restricted airflow or protection system | Check filters, bin, hose, and manual |
| Deep roaring | Motor or fan area | Possible internal damage or airflow problem | Stop if the sound is severe or new |
Why does my vacuum make a rattling noise?
A rattling vacuum may have swallowed a small hard object. Coins, stones, plastic pieces, screws, and clips can bounce inside the floor head or hose.
Disconnect power before checking. Remove detachable tools and gently inspect each accessible airflow section.
Why is my vacuum making a high-pitched noise?
A higher pitch often appears when air is forced through a narrowed passage. A partly blocked hose, dirty filter, poorly fitted seal, or clogged attachment can create this effect.
The sound may change when you disconnect a particular tool. That can help isolate the restricted area.
Why does my vacuum squeal or grind?
Squealing can come from the brush-roll drive system or another moving component. Grinding is more concerning because two parts may be rubbing or failing.
Don’t keep running the machine to see whether the noise disappears. Continued operation can turn a small mechanical problem into a larger repair.
How Do You Fix a Noisy Vacuum Cleaner Step by Step?
Start with the checks that require no internal electrical repair. Work from the dirt container and airflow path toward the powered floor head.
1. Unplug the vacuum or disconnect its battery
Disconnect electrical power before removing the hose, brush cover, filter, or floor-head components. For cordless models, remove the battery only when the manufacturer designed it to be removable.
Never work around a powered brush roll while the machine is energized. It can begin rotating unexpectedly.
2. Empty the bin or inspect the bag
An overfilled dirt container can restrict airflow. That may change both suction and motor sound.
Empty a bagless bin carefully. For bagged models, replace the bag according to the manufacturer’s instructions rather than packing it completely full.
3. Check the vacuum filters
A heavily loaded filter makes airflow harder to maintain. The vacuum may sound sharper, strained, or different from normal.
- Remove only filters intended for user access.
- Tap or clean them only as the manufacturer directs.
- Wash only filters specifically labeled washable.
- Let washable filters dry completely before reinstalling them.
- Replace disposable filters when their instructions require replacement.
Consumer Reports also recommends regular filter, brush, bin, and hose maintenance in its vacuum maintenance guidance.
4. Inspect the hose, wand, and intake
Remove the hose and look through it where possible. A sock, paper wad, pet-hair clump, or other obstruction may restrict airflow without completely stopping suction.
Check elbows and narrow joints carefully. These areas can hide debris that isn’t visible from either end.
- Disconnect removable hose sections.
- Look through straight sections toward a light source.
- Check hose cuffs and connector openings.
- Inspect the wand and floor-head intake.
- Avoid sharp tools that could puncture a flexible hose.
5. Clean the brush roll
Turn the floor head over after disconnecting power. Look for hair, string, thread, and carpet fibers around the roller.
Heavy wrapping can make the roller harder to turn. It can also produce clicking, squealing, or intermittent brush noise.
Cut tangled fibers carefully if your manual allows it. Keep scissors and blades away from the belt, electrical wires, and soft roller material.
6. Check the belt if your vacuum uses one
Some vacuums use a belt to drive the brush roll. A stretched, damaged, displaced, or broken belt can create unusual sounds and stop normal brush rotation.
Access varies widely by model. Consumer Reports has a practical overview of vacuum belt replacement, but your model’s manual should control the actual procedure.
7. Reassemble and test briefly
Reinstall every part securely. Make sure filters, covers, bins, hoses, and attachments are fully seated before restoring power.
Run the vacuum briefly on an appropriate surface. Stop immediately if the original severe noise remains.
Expert Alert: Stop troubleshooting and contact a qualified appliance technician if the noise appears to come from inside the sealed motor housing, electrical components, internal fan, or inaccessible bearings.
Section Takeaway: Work from simple airflow restrictions toward mechanical parts. Never open electrical or sealed motor components unless the manufacturer specifically designed them for user servicing.
Which Vacuum Parts Commonly Cause Noise?
The brush roll, belt, hose, filters, wheels, fan area, and motor can all change a vacuum’s sound. The safest diagnosis starts with parts you can inspect without touching electrical internals.
Brush roll and floor head
The floor head handles constant contact with hair, thread, pet fur, carpet fibers, and hard debris. That makes it one of my first checks for tapping or squealing.
- Wrapped hair can restrict rotation.
- A small stone can strike the housing repeatedly.
- A loose end cap can create side-to-side movement.
- A damaged wheel can click against hard flooring.
- A misfitted cover can vibrate during use.
Vacuum belt
A belt transfers movement to the roller on many traditional vacuums. Wear, misalignment, or damage can produce squealing or poor brush performance.
Not every vacuum uses a replaceable belt. Don’t assume a cordless stick or robot vacuum has the same drive system as an upright.
Hose and seals
An airflow leak often creates a whistle. A partial obstruction can also produce an unusually high-pitched sound.
Inspect hose connections and removable seals for obvious gaps. Replace damaged parts with components intended for your model.
Filters
Filters trap fine particles before air continues through or exits the vacuum. A heavily restricted filter can change airflow and operating sound.
HEPA means high-efficiency particulate air. A HEPA filter’s presence does not mean every vacuum part can be washed, so always check the manual.
Fan and motor area
The motor and fan create the airflow that gives a vacuum suction. Damage in this area can create roaring, grinding, vibration, or a harsh mechanical tone.
This is where DIY diagnosis should usually stop. Internal electrical repair is different from clearing a removable hose or cleaning a roller.
Section Takeaway: Brush rolls and airflow paths are reasonable homeowner checks. Grinding from the sealed motor or fan area is a repair issue, not a cue to dismantle the vacuum further.
When Should You Stop Using a Noisy Vacuum?
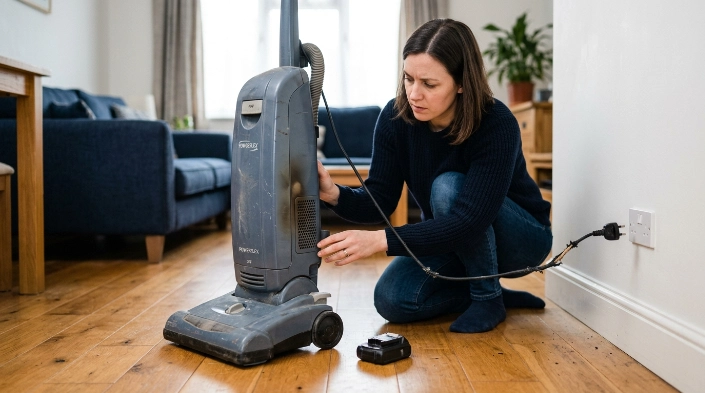
Stop using the vacuum when the sound suggests heat, electrical trouble, or internal mechanical damage. Continuing to run it may worsen the fault.
Disconnect power if you notice any of these signs:
- Burning smell: Stop immediately, even if suction still seems normal.
- Smoke: Disconnect power and don’t restart the machine.
- Grinding: A rotating internal part may be contacting another component.
- Severe vibration: Something may be loose, unbalanced, or damaged.
- Repeated shutdowns: The vacuum may be overheating or entering a protection mode.
- Damaged cord or plug: Do not continue using a corded vacuum with electrical damage.
- Battery heat or damage: Stop using a cordless machine with an abnormally hot, swollen, leaking, or visibly damaged battery.
Sound exposure also matters. The National Institute on Deafness and Other Communication Disorders explains that hearing risk depends on sound level, duration, and distance.
You don’t need a phone app to diagnose your vacuum’s mechanical condition. A sudden major increase in sound is enough reason to stop and investigate.
Expert Alert: Electrical faults, damaged batteries, smoke, persistent burning smells, or internal motor repairs should be handled by the manufacturer, an authorized service center, or a qualified appliance professional.
How Can You Prevent Vacuum Noise From Coming Back?
Routine maintenance reduces many avoidable vacuum noises. Focus on keeping airflow open and rotating parts free from debris.
Check the brush roll regularly
Hair buildup is easier to remove before it becomes tightly wrapped. Pet owners and long-haired households may need to inspect the roller more often.
Don’t ignore falling suction
Reduced pickup can be an early sign of restricted airflow. Check the dirt container, filters, hose, floor head, and attachments before the restriction becomes severe.
Use the correct setting
A floor head set incorrectly for a surface can work harder than necessary. Follow the vacuum manufacturer’s carpet-height and brush-roll recommendations.
Avoid vacuuming unsuitable debris
Don’t pick up liquids with a standard dry vacuum unless the manufacturer rates it for wet pickup. Avoid large, sharp, burning, or construction debris outside the machine’s intended use.
Clean instead of automatically disinfecting
Normal vacuum maintenance usually involves removing dirt rather than applying disinfectant. Keep liquids away from motors, batteries, charging contacts, and electrical connections.
For ordinary household surfaces, the CDC distinguishes routine cleaning from situations that call for sanitizing or disinfection. Follow product and appliance instructions whenever moisture or cleaning chemicals are involved.
Store the vacuum carefully
A crushed hose, bent attachment, damaged power cord, or poorly stored floor head can create future problems. Store parts without sharp bends or heavy objects pressing on them.
A short inspection after demanding cleaning sessions can catch trouble early. That’s especially helpful after vacuuming pet hair, long fibers, or heavily soiled carpet.
Section Takeaway: Most preventable vacuum noise comes back to airflow, debris, and moving parts. Small maintenance checks are easier than diagnosing a machine after the sound becomes severe.
Frequently Asked Questions
Why is my vacuum suddenly making a loud noise?
A sudden loud noise can come from a blockage, loose debris, a tangled brush roll, damaged belt, air leak, or mechanical problem. Unplug the vacuum first, then inspect accessible airflow and brush components before using it again.
Why does my vacuum sound like it is screaming?
A sharp or screaming sound can occur when airflow is restricted or escaping through a small opening. Check the hose, filters, bin, bag, seals, and attachments. Stop using the vacuum if the sound appears mechanical rather than air-related.
Can a clogged filter make a vacuum louder?
Yes. A heavily restricted filter can change the way air moves through the vacuum and alter its sound. Clean or replace the filter only according to the manufacturer’s instructions, and never wash a filter unless it is specifically washable.
Why is my vacuum making a rattling sound?
Rattling often comes from a loose object in the floor head, hose, or dust path. Disconnect power and inspect accessible areas for coins, stones, plastic pieces, clips, or other debris before checking for loose covers or components.
Can hair around the brush roll make a vacuum noisy?
Yes. Hair, string, and fibers can restrict brush-roll movement and create clicking, rubbing, or squealing sounds. Disconnect power and remove the material carefully, following the floor-head cleaning instructions for your model.
Is a grinding vacuum dangerous?
A grinding noise can indicate contact between moving parts or a damaged component. Stop using the vacuum until you identify the source. If grinding comes from the motor, fan, bearings, or another sealed area, professional service is the safer option.
Is it worth repairing a noisy vacuum cleaner?
That depends on the cause, vacuum age, replacement-part availability, warranty status, and repair cost. A clog or tangled roller can be simple to fix, while motor or electronic damage may justify comparing professional repair costs with replacement.
Final Takeaway: When a vacuum suddenly becomes noisy, don’t start by taking the motor apart. Empty it, restore airflow, inspect the brush roll and accessible drive parts, then test it briefly.
If the noise remains severe, grinding, electrical, or accompanied by heat or a burning smell, stop using the machine. Getting the right repair is safer than forcing a damaged vacuum through another cleaning session.
