
A brush for cleaning dryer vents is a genius essential tool that removes lint buildup, preventing fires and improving dryer efficiency.
Your clothes dryer works hard, but a hidden problem can make it less effective and even dangerous. Lint, a fluffy byproduct of drying clothes, can build up inside your dryer’s vent hose. This buildup isn’t just messy; it’s a serious fire hazard. A specialized brush for cleaning dryer vent is a simple, yet incredibly effective tool to combat this common issue. It helps you keep your dryer running safely and efficiently, saving you money and peace of mind. Let’s explore why this humble tool is a must-have for every home.
Why Dryer Vent Cleaning is So Important
Cleaning your dryer vent regularly is crucial for preventing house fires and ensuring your dryer operates efficiently. Lint accumulation is highly flammable. When it gets packed into the vent, it restricts airflow. This restriction can cause your dryer to overheat, potentially igniting the lint. Beyond fire safety, a clogged vent makes your dryer work harder. This means longer drying times and higher energy bills.
The Hidden Dangers of Lint Buildup
Lint is essentially tiny fibers from your clothes. As clothes tumble and dry, these fibers are released. Most of this lint is caught by your dryer’s lint trap. However, some escapes and makes its way into the dryer vent system. Over time, this escaped lint accumulates. It forms a dense, dry mat inside the vent hose and dryer cabinet.
According to the National Fire Protection Association (NFPA), clothes dryers were involved in an average of 13,820 reported home fires per year between 2014 and 2018. These fires caused an average of 440 injuries and 15 deaths annually. The leading cause of these fires was failure to clean the dryer, including the vent and exhaust duct. This statistic highlights the critical need for regular dryer vent maintenance.
Signs Your Dryer Vent Needs Cleaning
Several signs indicate it’s time to grab your brush for cleaning dryer vent. Your clothes might still feel damp after a full drying cycle. The outside of your dryer could feel unusually hot to the touch. You might notice a burning smell when the dryer is running. The vent hood flap on the exterior of your house might not be opening fully, or at all, when the dryer is on.
These are all clear warnings that airflow is restricted. A blocked vent forces the dryer to work harder and hotter. This not only increases the risk of fire but also wears out your appliance faster.
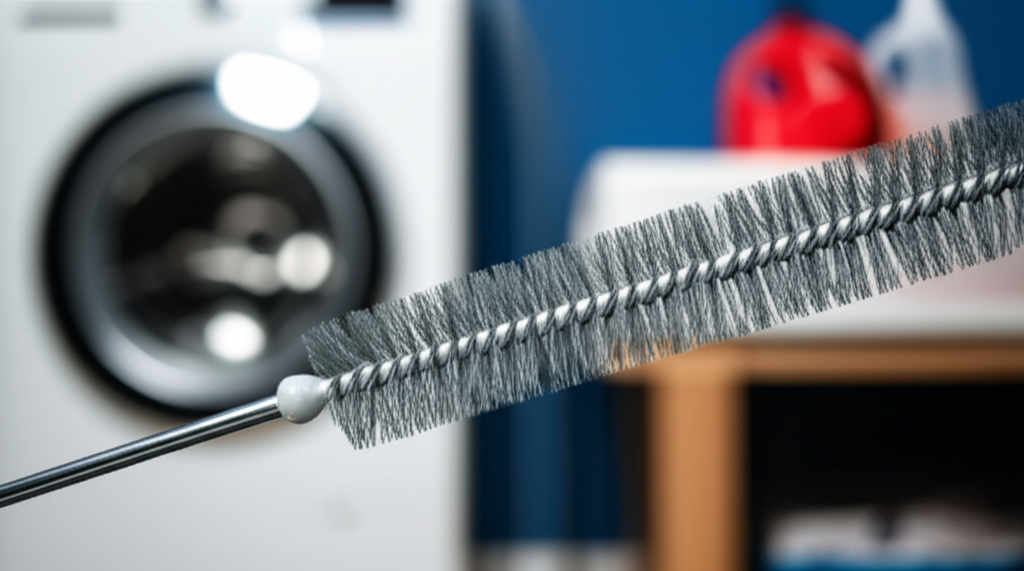
What is a Dryer Vent Cleaning Brush?
A dryer vent cleaning brush is a long, flexible tool designed to reach deep into dryer vents and remove accumulated lint. These brushes typically consist of a flexible rod or cable with bristles attached to one end. They come in various lengths and stiffness levels to suit different vent types and cleaning needs. Some are designed to be attached to a drill for powered cleaning.
This tool is specifically engineered to navigate the twists and turns of dryer vent hoses. Its bristles are designed to dislodge and pull out stubborn lint that a vacuum cleaner alone cannot reach. It’s a simple yet ingenious solution for a common household problem.
How Dryer Vent Cleaning Brushes Work
The magic of a dryer vent brush lies in its design. The flexible shaft allows it to bend and maneuver through elbows and turns in the vent duct. The bristles, often made of sturdy plastic or nylon, effectively scrape lint off the interior walls. As you push and pull the brush, it loosens the lint. This loosened lint can then be vacuumed out or will be expelled by the dryer’s airflow.
Imagine trying to clean a long, winding pipe. A stiff rod might get stuck, while a completely flexible one might not have enough power. A dryer vent brush strikes the perfect balance, offering the flexibility to navigate the path and the stiffness to scrub away debris.
Types of Dryer Vent Cleaning Brushes
There are a few main types of dryer vent cleaning brushes you’ll encounter. Some are simple, manual tools. Others are designed to work with a power drill.
Manual Brushes: These are the most basic. They consist of a long, flexible rod and a brush head. You simply push and pull the rod to clean. They are affordable and easy to use for shorter, straighter vents.
Drill-Powered Brushes: These feature a shaft that connects to a power drill. The drill spins the brush head at high speed. This powered action is much more effective at dislodging stubborn lint. They are ideal for longer vents or those with significant buildup.
Chimney Brushes: While primarily for chimneys, some larger, more robust vent brushes are similar. These might be overkill for a typical dryer vent but can be useful for very large or commercial-grade systems.
When choosing, consider the length and complexity of your dryer vent. Most residential vents can be cleaned effectively with a standard drill-powered brush kit.
The Best Brush for Cleaning Dryer Vent: Features to Look For
When selecting a brush for cleaning your dryer vent, prioritize flexibility, length, bristle type, and compatibility with power tools. A good brush should easily navigate tight bends and reach the full length of your vent system. The bristles should be firm enough to grab lint but not so abrasive that they damage the vent material.
Consider the material of your vent hose. If it’s flexible plastic or foil, you’ll want softer bristles. For rigid metal ducts, stiffer bristles are usually fine.
Flexibility and Reach
The most critical feature is the brush’s ability to bend and flex. Dryer vents often have several 90-degree turns. Your brush needs to navigate these without getting stuck. Look for brushes with segmented rods or highly flexible, coil-like shafts.
The length of the brush is also paramount. Measure your vent duct if possible, or estimate its length. You’ll want a brush that can reach the entire length, from the dryer to the exterior vent hood. Kits often come with extension rods, allowing you to customize the length.
Bristle Material and Stiffness
Bristles are the workhorses of the vent brush. They need to be effective at grabbing lint. Common materials include nylon, plastic, or wire. For most residential vents, nylon or sturdy plastic bristles are best. They are effective at dislodging lint without scratching or damaging the vent lining, especially in flexible ducts.
Wire brushes can be more aggressive but may damage softer vent materials. If your vent is made of rigid metal, a wire brush might be more effective for stubborn clogs. However, always start with a less aggressive option if unsure.
Drill Compatibility
If you opt for a powered brush, ensure it’s compatible with your drill. The connection point should be secure. A brush that spins smoothly and powerfully will make the job much easier. Many kits come with adapters for standard drills.
A drill-powered brush can significantly cut down cleaning time. It also provides more agitation, which is excellent for breaking up compacted lint. Always use caution when operating a drill-powered tool.
Durability and Construction
A good dryer vent brush should be durable. You don’t want a tool that breaks halfway through the job. Look for sturdy connections between rod segments, a well-attached brush head, and robust materials. Many users recommend brands known for quality construction.
How to Use a Brush for Cleaning Dryer Vent: Step-by-Step Guide
Cleaning your dryer vent with a brush is a straightforward DIY task that significantly improves safety and efficiency. This process involves disconnecting the dryer, inserting the brush, cleaning the duct, and reassembling. Safety first: always unplug your dryer before starting.
This guide will walk you through each step, ensuring you perform the cleaning effectively and safely.
Step 1: Preparation and Safety Precautions
Before you begin, gather your tools and ensure the dryer is safely disconnected from power. Unplug the power cord from the wall outlet. If you have a gas dryer, turn off the gas supply valve as well. This is a critical safety step to prevent electric shock or gas leaks.
You will need:
Your chosen brush for cleaning dryer vent.
A vacuum cleaner with a hose attachment.
Screwdriver or nut driver (to remove the vent clamp).
Gloves and a dust mask.
A towel or drop cloth to catch any falling lint.
Step 2: Disconnect the Dryer Vent Hose
Carefully detach the vent hose from the back of the dryer and the wall outlet. There is usually a metal clamp holding the hose in place. Use a screwdriver or nut driver to loosen this clamp. Gently pull the hose off both the dryer’s exhaust port and the wall duct.
Be prepared for some lint to fall out at this stage. Have your towel or drop cloth ready. Inspect the hose itself for any tears or damage. If the hose is damaged, it should be replaced.
Step 3: Clean the Dryer Vent Duct
Insert the brush into the vent duct and begin cleaning, working from both ends if possible. If using a manual brush, push and pull it through the duct, rotating it as you go. If using a drill-powered brush, attach the drill and run it at a low to medium speed while slowly advancing the brush.
Work in sections, pulling the brush out periodically to clean off the lint it has gathered. Use your vacuum cleaner to suck up the dislodged lint as you work. Continue this process until you have cleaned the entire length of the vent.
Step 4: Clean the Dryer’s Exhaust Port and Lint Trap
While the vent is disconnected, thoroughly clean the dryer’s exhaust port and the lint trap housing. Lint can also build up directly at the point where the vent connects to the dryer. Use your brush or a vacuum crevice tool to clean this area.
Remove the lint trap and clean it thoroughly. Consider using a small brush or vacuum to clean the slot where the lint trap inserts. This ensures optimal airflow from the dryer itself.
Step 5: Reconnect and Test
Securely reattach the vent hose to the dryer and the wall, then plug the dryer back in. Ensure the clamp is tightened firmly. Make sure there are no kinks in the hose.
Once reconnected, turn the dryer on for a short cycle. Check the exterior vent hood to ensure air is flowing freely. You should also notice less heat building up around the dryer.
When to Call a Professional for Dryer Vent Cleaning
While a DIY cleaning with a brush is effective for most situations, professional cleaning is recommended for severe clogs or complex vent systems. If you’ve tried cleaning yourself and still experience poor drying performance, it might be time to call an expert. Professionals have specialized equipment to handle challenging situations.
Professionals can also inspect your entire vent system for damage or improper installation. They can identify issues that might be beyond the scope of a typical DIY cleaning.
Signs You Need Professional Help
If your dryer vent is excessively long, has many sharp turns, or is difficult to access, a professional might be better equipped. Persistent issues after a DIY cleaning are another strong indicator. This could mean deeply compacted lint or even a partial obstruction like a bird’s nest.
A professional service can provide a thorough cleaning and inspection. They can also advise on vent upgrades if your current system is outdated or inefficient. Many offer annual service plans for ongoing maintenance.
Benefits of Professional Dryer Vent Cleaning
Professional cleaning ensures your vent is cleared of all lint, including in areas you might miss. They can also identify potential hazards like deteriorating vent material or inadequate ventilation. This provides peace of mind and optimal dryer performance.
According to HomeAdvisor, professional dryer vent cleaning costs can range from $100 to $250. While this is more expensive than a DIY brush, it can be a worthwhile investment for safety and appliance longevity.
Maintaining Your Dryer and Vent System
Regular maintenance is key to keeping your dryer and vent system running efficiently and safely. This includes frequent lint trap cleaning, periodic vent brushing, and visual inspections. Making these habits part of your home care routine prevents future problems.
Consistent care not only enhances safety but also extends the lifespan of your dryer. It ensures your appliance operates at peak performance, saving energy and time.
The Importance of Regular Lint Trap Cleaning
Always clean the lint trap after every single use of your dryer. This is the most basic but crucial step in preventing lint buildup. A clogged lint trap severely restricts airflow, making your dryer work harder and increasing fire risk.
Make it a habit: as soon as you remove clothes, pull out the lint screen, remove the lint, and put it back. Some dryers have indicators that remind you to clean the trap, but it’s best to do it every time.
Frequency of Vent Brush Cleaning
For most households, cleaning the dryer vent with a brush is recommended at least once a year. If you have a large family, do a lot of laundry, or notice signs of a clogged vent, you may need to clean it more often, perhaps every six months.
Consider your laundry habits. Households with pets that shed a lot or those who frequently wash heavy items like towels and bedding will accumulate lint faster.
Inspecting Your Vent System
Periodically check the exterior vent hood for obstructions and ensure it opens and closes freely. Also, visually inspect the vent hose behind the dryer for any signs of damage, such as kinks, tears, or cracks. Damaged hoses should be replaced immediately.
A quick visual check can save you from bigger problems down the line. Ensure the vent hood is clear of debris, snow, or nesting materials.
Alternatives to a Dryer Vent Cleaning Brush
While a dedicated brush is highly effective, other methods and tools can help clean dryer vents, though they may be less efficient. These include specialized vacuum attachments and professional cleaning services. Each has its own set of pros and cons.
Understanding these alternatives can help you choose the best approach for your specific needs and comfort level.
Vacuum Attachments
Specialized vacuum attachments can reach some areas of the dryer vent, but they often lack the scrubbing power of a brush. Many vacuums come with crevice tools and flexible hoses that can get into the immediate area behind the dryer. Some kits offer longer, more flexible hoses.
These attachments are good for removing loose surface lint but struggle with compacted buildup. They are best used in conjunction with a brush or for very light maintenance.
Compressed Air
Using compressed air can help blow out some lint from the vent system. This method is relatively quick and can dislodge loose debris. However, it can also push lint further into the ductwork, making it harder to remove completely.
Compressed air is not a substitute for mechanical cleaning with a brush. It’s more of a supplementary tool for loosening debris before or after brushing.
Professional Cleaning Services
As mentioned, professional services offer the most thorough cleaning and inspection. They use high-powered equipment and have the expertise to handle any vent configuration. This is the most reliable option for deep cleaning and ensuring maximum safety.
While more expensive, professional cleaning provides peace of mind. It’s a great option if you’re uncomfortable doing the task yourself or if you suspect a significant blockage.
Dryer Vent Brush Kits: What’s Included
A comprehensive dryer vent brush kit typically includes a flexible rod, a brush head, and often extension pieces for added reach. Some advanced kits also come with adapters for power drills, enhancing their cleaning power. The quality and quantity of components can vary significantly between kits.
Choosing a kit with ample extensions and a durable brush head ensures you can tackle vents of various lengths and complexities.
Common Components
Flexible Rods: These are usually made of plastic or metal and connect together to form a long, flexible shaft.
Brush Head: The part that does the cleaning, typically with stiff bristles.
Extension Pieces: Additional rod segments to increase the brush’s reach.
Drill Adapter: A connector that allows you to attach the rod to a power drill for powered cleaning.
* Storage Bag: Some kits come with a bag for easy storage.
What to Look for in a Kit
When selecting a kit, consider the total length it offers. Measure your vent or estimate its length to ensure the kit is sufficient. Check reviews for durability and ease of assembly. A kit that includes a drill adapter can be a significant time-saver.
Look for kits that specify the type of bristles and their suitability for different vent materials. A good kit should provide value and effectiveness for the price.
Addressing User Frustrations and Concerns
Many people worry about damaging their dryer vent or making the problem worse when cleaning. Common frustrations include brushes getting stuck, not reaching the full length, or not removing enough lint. These concerns are valid and can be addressed by choosing the right tool and following proper procedures.
It’s natural to feel hesitant about DIY appliance maintenance. However, with the right information and tools, cleaning your dryer vent is a manageable and rewarding task.
Brush Getting Stuck
If a brush gets stuck, avoid forcing it. Try gently wiggling it or rotating it to dislodge it. If it remains stuck, you may need to carefully pull it back out and try a different approach or a more flexible brush. Sometimes, partially disassembling the vent pipe can help.
Forcing a stuck brush can damage the vent or the brush itself. Patience and a gentle approach are key.
Incomplete Cleaning
If you suspect the cleaning wasn’t complete, repeat the process or try a different method. Ensure you are working from both ends of the vent if possible. Using a vacuum cleaner to suck out loosened lint is also crucial.
Sometimes, very compacted lint requires multiple passes or a more aggressive brush. If problems persist, it’s a sign to consider professional help.
Vent Material Damage
To avoid damaging the vent, always use brushes with appropriate bristle stiffness for your vent material. Flexible plastic or foil ducts are more delicate than rigid metal ducts. Start with softer bristles if you’re unsure.
Regular inspection of your vent during cleaning can help you spot any potential damage early.
FAQ: Your Dryer Vent Brush Questions Answered
Here are answers to common questions about using a brush for cleaning dryer vents. These address typical user concerns and provide practical advice.
How often should I clean my dryer vent?
For most homes, cleaning your dryer vent with a brush once a year is sufficient. However, if you have pets that shed a lot or do large amounts of laundry, consider cleaning it every six months.
Can I use a regular vacuum cleaner to clean my dryer vent?
A vacuum cleaner is helpful for removing loose lint after brushing, but it cannot effectively clean compacted lint inside the vent. Specialized vacuum attachments can reach some areas, but a brush is generally more effective for deep cleaning.
What if my dryer vent is very long?
If your dryer vent is unusually long or has many bends, you’ll need a brush kit with sufficient length and flexibility. Look for kits that offer multiple extension rods. If the vent is exceptionally complex or long, professional cleaning might be a better option.
Can cleaning the dryer vent cause damage?
There’s a risk of damage if you use an overly aggressive brush or force a stuck brush. Always use the appropriate brush stiffness for your vent material and be gentle. Flexible plastic or foil vents are more delicate than rigid metal ones.
Is a drill-powered brush better than a manual one?
A drill-powered brush is generally more effective and faster at dislodging stubborn lint due to its high-speed rotation. However, a manual brush is perfectly adequate for vents with light buildup or for users who prefer not to use power tools.
Where does the lint go when I clean the vent?
The brush loosens the lint, which then either falls out as you pull the brush back or is expelled by the dryer’s airflow. It’s best to use a vacuum cleaner to capture the dislodged lint as you work.
Conclusion: The Indispensable Dryer Vent Brush
A brush for cleaning dryer vent is an indispensable tool for every homeowner focused on safety and appliance efficiency. It’s a simple, affordable solution to a common problem that carries significant risks. By investing in a quality brush and performing regular maintenance, you can prevent dangerous lint fires, reduce energy consumption, and extend the life of your dryer.
Don’t underestimate the power of this humble tool. Making dryer vent cleaning a part of your home maintenance routine is a smart, proactive step. It ensures your dryer runs safely and efficiently, giving you peace of mind and well-dried clothes. Consider adding a reliable brush for cleaning dryer vent to your cleaning arsenal today.