Bissell Carpet Cleaner Parts Diagram: Essential Guide
Understand your Bissell carpet cleaner’s inner workings with a detailed parts diagram to simplify maintenance and repairs, ensuring your machine runs smoothly for spotless floors.
Carpets can get dirty quickly. Spills happen, and everyday dirt can build up. A Bissell carpet cleaner is a great tool to keep them fresh. But sometimes, a part might break or need cleaning. Knowing what each piece does is super helpful. This guide will show you a Bissell carpet cleaner parts diagram. You will learn about each component and its job. This knowledge helps you fix problems and keep your cleaner working its best.
Why You Need a Bissell Carpet Cleaner Parts Diagram
Knowing the parts of your Bissell carpet cleaner is like having a cheat sheet for its care. It helps you understand how the machine works. This makes fixing it much easier. It also helps you clean it properly. A clean machine works better and lasts longer. This guide will walk you through the common parts. We’ll explain what each one does.
Understanding Your Bissell Carpet Cleaner’s Core Components
Your Bissell carpet cleaner has several key parts working together. These parts suck up dirt, spray water and solution, and collect dirty water. Knowing these main pieces helps you identify issues quickly. We will break down the most common ones you’ll find.
The core function of a carpet cleaner is to loosen dirt with water and cleaning solution. Then, it sucks up that dirty water and debris. Understanding the parts that perform these actions is crucial for effective operation.
The Water and Solution System: Tanks and Hoses
This is where the cleaning magic starts. The clean water tank holds fresh water and cleaning solution. The dirty water tank collects the used water and grime. Hoses connect these tanks to the spray nozzle and the suction system.
Clean Water Tank: This holds your cleaning solution and fresh water. It’s usually at the top or front of the cleaner.
Dirty Water Tank: This collects the dirty water after cleaning. It’s often located behind the clean water tank.
Hoses: These carry water from the clean tank to the brush and then carry dirty water to the dirty tank.
Keeping these tanks clean and free of clogs ensures the machine can deliver fresh solution and effectively remove dirty water. This prevents re-soiling your carpets.
The Suction and Filtration System: Motors and Filters
This system is what pulls the dirt and water from your carpet. A powerful motor creates suction. This suction pulls everything into the dirty water tank. Filters are important here. They trap dirt and debris before the air goes back out.
Motor: This powers the suction. A strong motor means better cleaning.
Hose and Nozzle: These direct the suction to your carpet.
Filters: These catch fine particles. They keep the air clean and protect the motor.
A clogged filter or a weak motor can significantly reduce your cleaner’s effectiveness. Regular cleaning and replacement of filters are vital for optimal performance.
The Brush Roll and Cleaning Head Assembly
The brush roll is the part that agitates your carpet fibers. It scrubs the carpet to loosen dirt. The cleaning head is the part that sits on the carpet. It houses the brush roll and the nozzle that sprays water.
Brush Roll: This spins and scrubs the carpet. Different models have different brush types.
Nozzle: This sprays the cleaning solution onto the carpet.
Cleaning Head: This is the main part that touches the carpet. It guides the brush and spray.
The brush roll is key to deep cleaning. It physically works the cleaning solution into the carpet fibers. Ensuring it spins freely and is clean is essential.
The Exterior Casing and Handle Components
These are the parts you see and touch. The casing protects the internal components. The handle helps you maneuver the cleaner. Some models have controls on the handle.
Body/Casing: This covers the motor and tanks.
Handle: This is for carrying and pushing the cleaner.
Control Panel: Buttons for power, spray, and sometimes different modes.
These parts are important for usability. A comfortable handle and easy-to-reach controls make cleaning less of a chore.
Identifying Specific Bissell Carpet Cleaner Models and Their Diagrams
Bissell makes many carpet cleaner models. Each has a slightly different parts diagram. Common models include the ProHeat 2X series, the Little Green, and the PowerWash. Knowing your model number is the first step. You can usually find it on the back or bottom of the cleaner.
ProHeat 2X Models: These often have dual tanks and advanced heating features.
Little Green: This is a compact spot cleaner with fewer parts.
PowerWash: Known for its powerful cleaning action and rotating brushes.
Once you know your model, you can find its specific parts diagram online on the Bissell website. This is crucial for ordering the correct replacement parts.
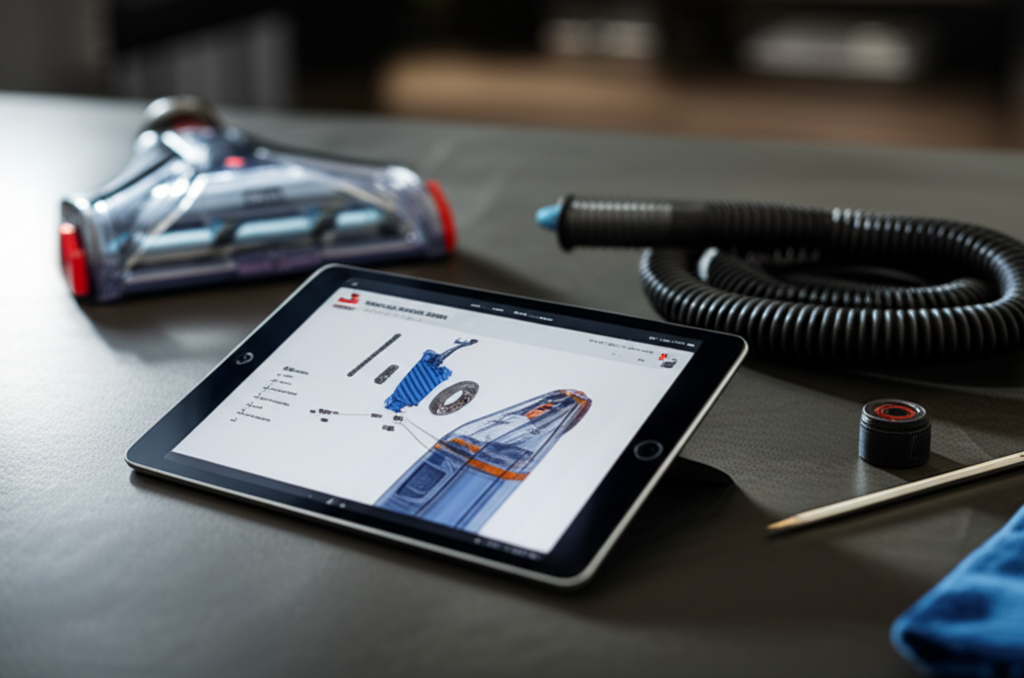
Where to Find Your Bissell Carpet Cleaner Parts Diagram Online
The best place to find an official Bissell carpet cleaner parts diagram is the Bissell website. Go to their support section. You can usually search by your model number. They often provide downloadable PDFs. These diagrams show every screw and part.
You can also find diagrams on parts retailer websites. Websites that sell Bissell parts will often have diagrams to help you identify what you need. Always double-check the model number to ensure accuracy.
Common Bissell Carpet Cleaner Parts That Need Replacement
Some parts wear out over time. These are the most common ones you might need to replace. Knowing this saves you time when a problem arises.
Hoses: They can get leaks or cracks.
Brush Rolls: Bristles can wear down.
Tanks: Lids can break or seals can fail.
Filters: They get clogged and need replacement.
Nozzles: They can become blocked with debris.
Replacing these parts is usually straightforward. It’s often much cheaper than buying a new machine.
How to Use the Parts Diagram for Maintenance and Troubleshooting
The parts diagram is your best friend for maintenance. See a leak? Check the hoses and tank seals on the diagram. Is it not picking up water? Look at the suction hose and dirty water tank connections. The diagram shows you where everything connects.
Use the diagram to guide your cleaning. You can see how to remove tanks or access the brush roll for cleaning. This helps ensure you don’t miss any spots. This proactive approach prevents bigger problems later.
Step-by-Step Guide to Replacing a Common Bissell Carpet Cleaner Part
Let’s say you need to replace a hose on your Bissell. First, unplug the cleaner. Locate the damaged hose on your parts diagram. Note how it connects. You might need a screwdriver to remove a clamp or housing. Gently disconnect the old hose. Connect the new hose, ensuring a secure fit. Reassemble any parts you removed. Test the cleaner to ensure the leak is fixed.
Always refer to your specific model’s diagram for detailed instructions. Some repairs might require specialized tools. If unsure, contact Bissell support or a professional.
Troubleshooting Common Issues Using the Parts Diagram
Many common carpet cleaner problems can be solved by looking at the parts diagram. A dirty or clogged nozzle? The diagram shows its location. Poor suction? Check the dirty water tank seal and the filter. The diagram helps you visualize the airflow path.
For example, if your cleaner isn’t spraying solution, the diagram can help you trace the path from the clean water tank to the nozzle. This might reveal a blockage or a disconnected hose. This systematic approach saves you time and frustration.
FAQ: Your Bissell Carpet Cleaner Parts Diagram Questions Answered
Here are some common questions about Bissell carpet cleaner parts.
Q1: How do I find my Bissell carpet cleaner model number?
A: Look for a sticker on the back or bottom of your cleaner. It usually has the model name and number.
Q2: Where can I buy Bissell carpet cleaner replacement parts?
A: You can buy parts directly from the Bissell website, or from authorized appliance parts retailers.
Q3: What is the most common part to need replacement?
A: Hoses, brush rolls, and filters are among the most common parts that wear out or get clogged.
Q4: Can I use parts from a different Bissell model?
A: It’s best to use parts specifically designed for your model. Using incompatible parts can damage the cleaner.
Q5: How often should I clean the brush roll?
A: It’s recommended to clean the brush roll after each use. Check for hair and debris.
Q6: My carpet cleaner is leaking. What part should I check first?
A: Check the seals on your clean and dirty water tanks, and inspect all hoses for cracks or damage using your parts diagram.
Q7: How do I know if my filter needs replacing?
A: If you notice reduced suction or smell odors, your filter might be clogged and needs cleaning or replacement.
Conclusion: Keep Your Bissell Carpet Cleaner Running Smoothly
Understanding your Bissell carpet cleaner parts diagram is key to its longevity and performance. It empowers you to perform essential maintenance, troubleshoot issues effectively, and even tackle simple repairs yourself. By familiarizing yourself with the diagram for your specific model, you can keep your machine in top condition. This ensures your carpets stay clean and fresh for years to come. Don’t hesitate to use the diagram as your go-to guide for all things related to your Bissell carpet cleaner.

